
When it comes to basement makeovers, many homeowners focus on floors and walls, often overlooking one crucial design element — the ceiling. A basement ceiling can dramatically influence how cozy, bright, and stylish your space feels. Whether you want a rustic retreat, a modern hideaway, or a simple functional finish, there are endless ways to enhance your basement ceiling with budget-friendly DIY projects.
In this guide, we will explore 10 basement ceiling ideas DIY that you can tackle on your own, no matter your skill level. From exposed beams to painted ceilings, these ideas will help you turn your basement into an inviting part of your home without spending a fortune.

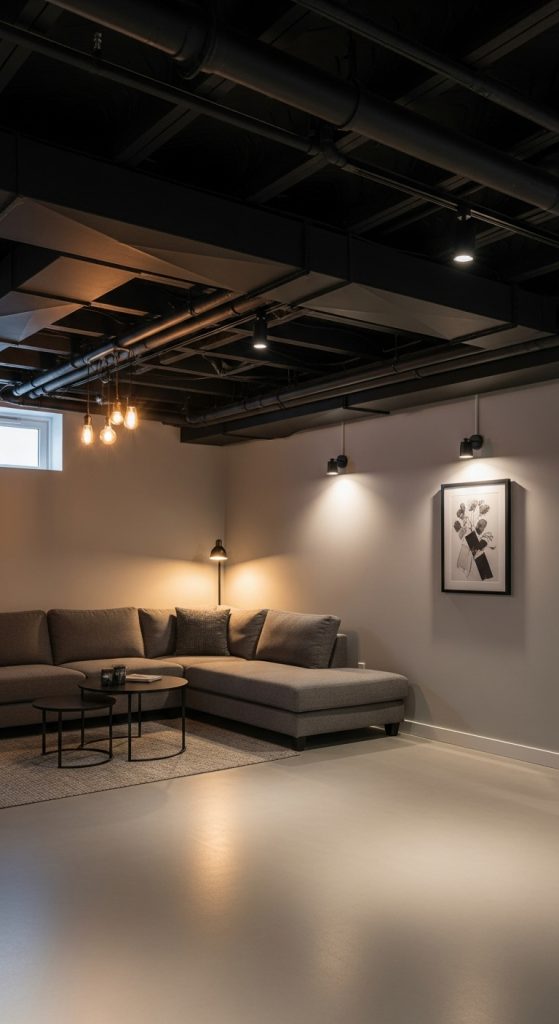
1. Exposed Basement Ceiling with Paint
One of the easiest and most affordable DIY basement ceiling ideas is to embrace an exposed ceiling. Instead of covering up ductwork, wiring, or beams, you can simply paint everything for a cohesive and industrial look.
How to do it:
- Clean the ceiling thoroughly to remove dust and cobwebs.
- Use a paint sprayer or roller to coat everything in a single color.
- Popular shades include black, white, or gray. Black hides imperfections and gives a modern look, while white opens up the space and reflects light.
Why it works:
An exposed and painted ceiling offers a loft-style vibe that’s trendy and low-maintenance. It also saves you the cost of materials like drywall or ceiling tiles.
DIY Tip: Use matte paint to avoid glare from lighting fixtures and achieve a smoother appearance.
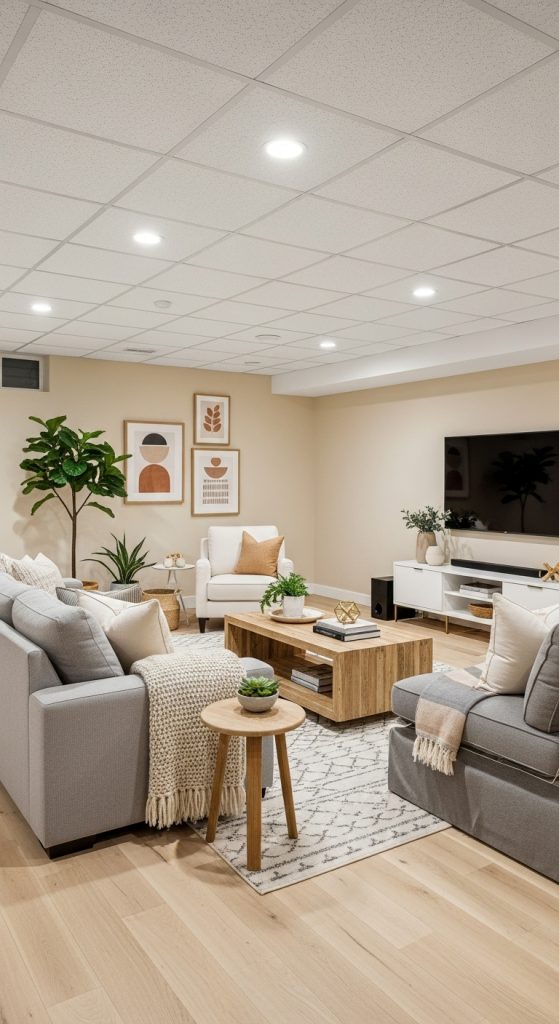
2. Drop Ceiling with Stylish Tiles
A drop ceiling (also called a suspended ceiling) is another popular DIY choice for basements, especially if you want easy access to plumbing or electrical systems.
How to do it:
- Install a metal grid system suspended a few inches below the floor joists.
- Choose decorative tiles or panels to insert into the grid.
Why it works:
Drop ceilings are functional, easy to repair, and available in a variety of styles — from sleek white tiles to faux tin designs that mimic vintage charm.
DIY Tip: Choose lightweight, moisture-resistant tiles for durability in basements that may have humidity.
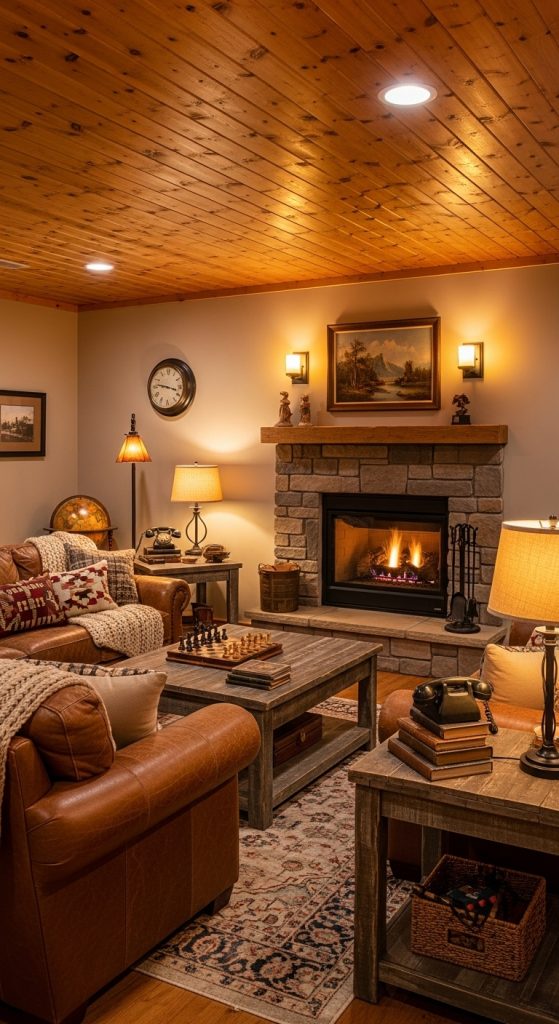
3. Wood Plank Ceiling for Warmth
Wood always brings warmth and charm to any space. A wood plank ceiling can turn a cold, dull basement into a cozy retreat.
How to do it:
- Measure and cut thin wood planks or tongue-and-groove boards.
- Nail or glue them directly to the ceiling joists.
- Finish with stain or paint for your desired look.
Why it works:
This DIY idea adds rustic elegance, especially for farmhouse or cabin-style basements. The natural wood texture makes the space feel more like a part of your home rather than a separate level.
DIY Tip: Use reclaimed wood for a sustainable and budget-friendly option.
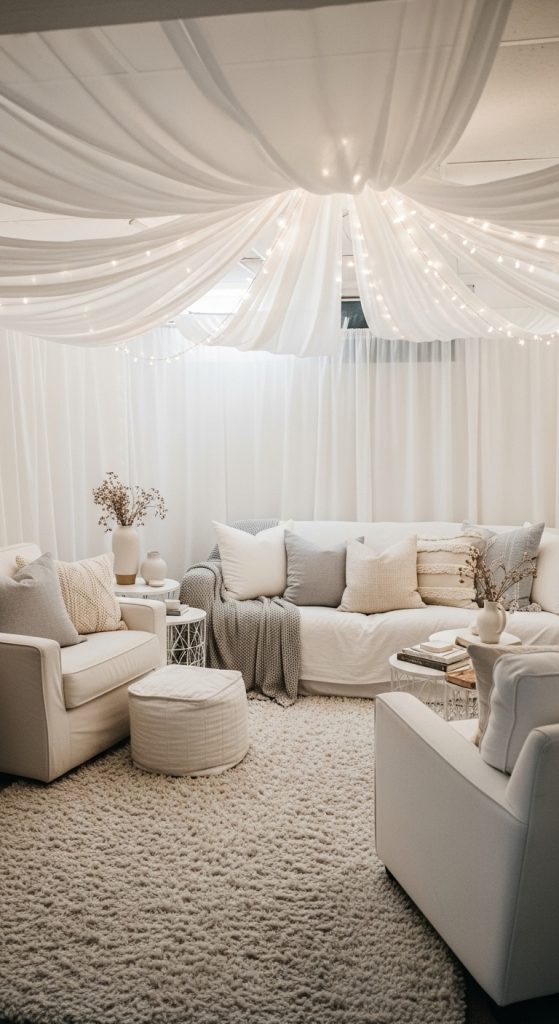
4. Fabric Ceiling for a Soft Touch
A fabric ceiling is an unexpected yet creative way to add softness and texture to your basement. It’s particularly great if you want to hide imperfections or pipes without construction work.
How to do it:
- Choose lightweight fabrics such as muslin or linen.
- Drape the fabric loosely across the ceiling and secure it with staples or curtain rods.
- Add fairy lights underneath for a dreamy ambiance.
Why it works:
This option adds warmth and a touch of elegance while remaining temporary and affordable.
DIY Tip: Wash and iron the fabric before installation to prevent sagging and wrinkles.
5. Beadboard Ceiling for a Classic Look
Beadboard panels can instantly elevate your basement ceiling with a charming, cottage-inspired style.
How to do it:
- Install furring strips on the ceiling for support.
- Nail or glue beadboard panels in place.
- Paint them white or soft pastel shades for a bright, inviting finish.
Why it works:
Beadboard adds architectural detail and texture without overwhelming the space. It’s perfect for basements that serve as family rooms or guest suites.
DIY Tip: Use moisture-resistant panels designed for basements to prevent warping.
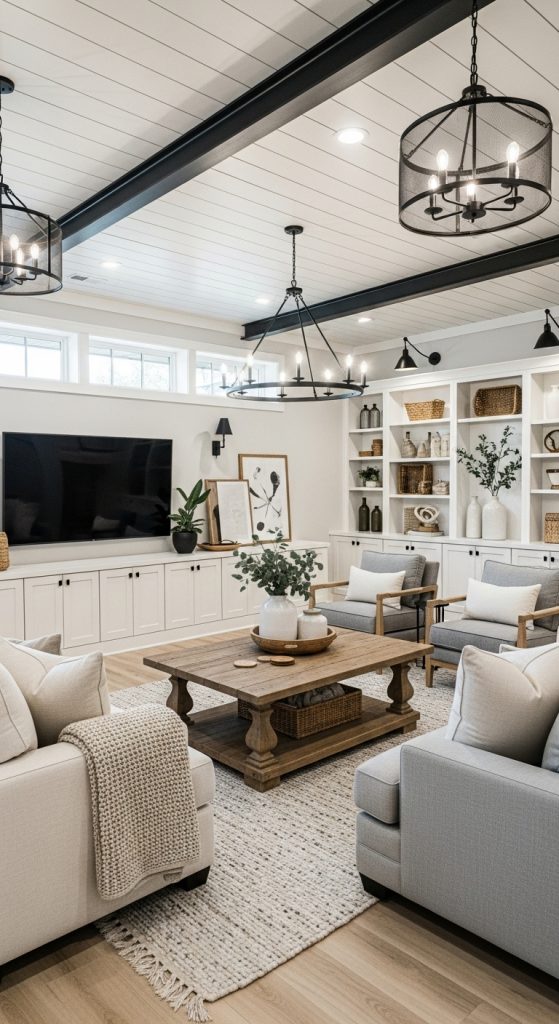
6. Shiplap Ceiling for Modern Farmhouse Style
If you love the modern farmhouse trend, a shiplap ceiling is a stylish and easy DIY project.
How to do it:
- Purchase shiplap boards or faux shiplap panels from your local hardware store.
- Attach them with a nail gun to the ceiling joists.
- Paint or stain to match your decor.
Why it works:
Shiplap ceilings add clean lines and texture, making the basement feel more polished. White or gray tones create a fresh, airy aesthetic.
DIY Tip: For a more dramatic look, paint the shiplap a deep navy or charcoal color.
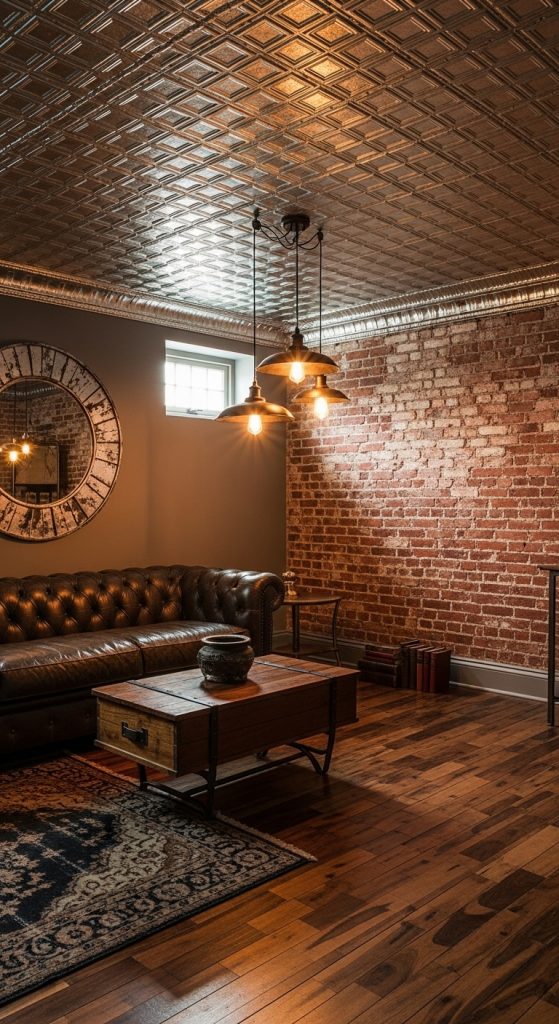
7. Tin Tile Ceiling for Vintage Charm
Give your basement a touch of vintage elegance with faux tin tiles. These lightweight panels mimic the ornate metal ceilings found in old buildings.
How to do it:
- Measure the ceiling and plan your tile layout.
- Attach adhesive-backed tin-style panels directly to the ceiling.
- For added authenticity, use metallic spray paint for a shiny finish.
Why it works:
Tin tiles reflect light beautifully and add a decorative element that instantly transforms a plain basement.
DIY Tip: Choose PVC or styrene tiles for a lightweight, affordable, and moisture-resistant option.
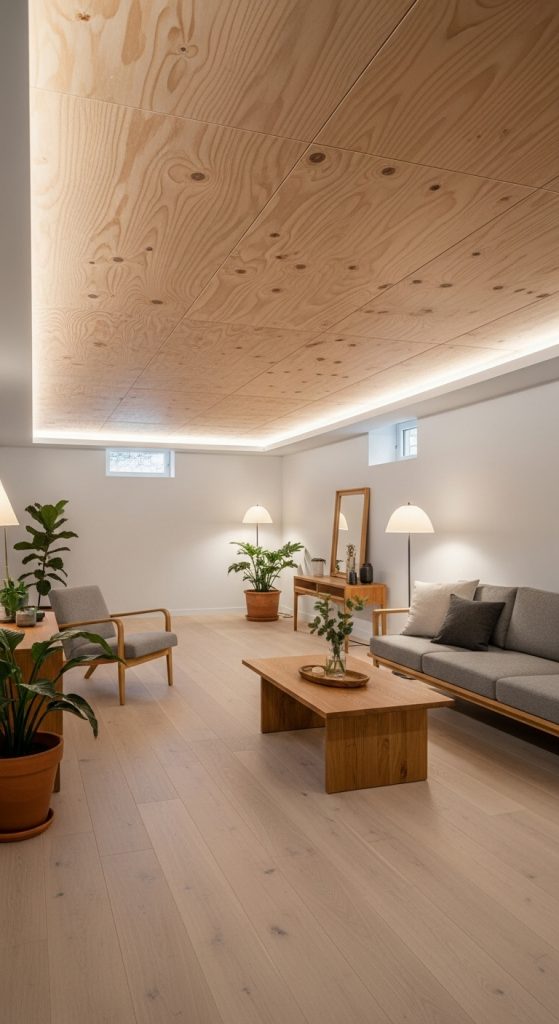
8. Plywood Ceiling for a Minimalist Finish
A plywood ceiling offers a minimalist and modern appeal while being one of the simplest DIY ceiling options.
How to do it:
- Cut plywood sheets to fit the ceiling.
- Sand the edges for a smooth finish.
- Attach them with nails or screws and finish with a light varnish or whitewash.
Why it works:
Plywood creates a clean, natural look that suits Scandinavian-inspired or contemporary spaces.
DIY Tip: Leave visible seams between panels for an industrial touch or cover them with trim for a more polished appearance.
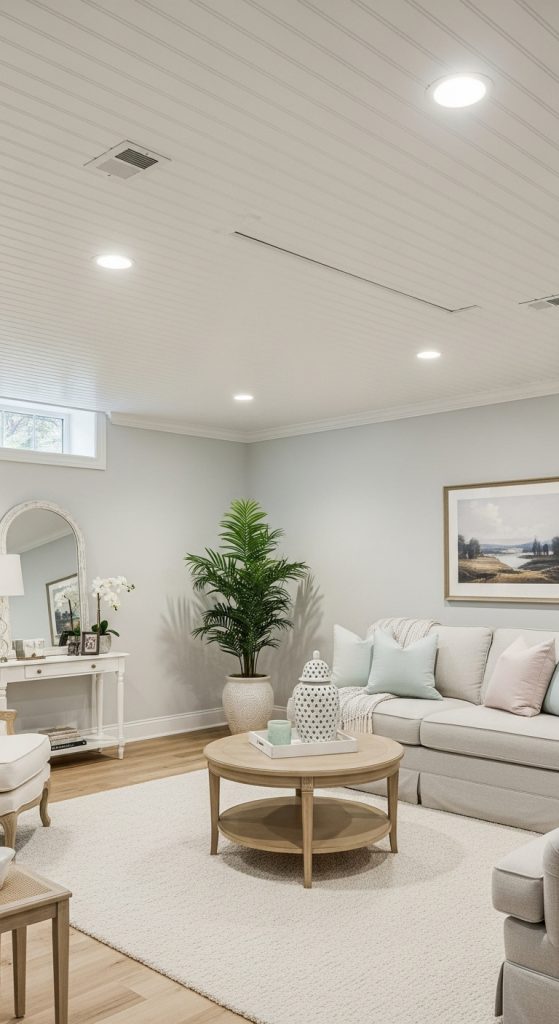
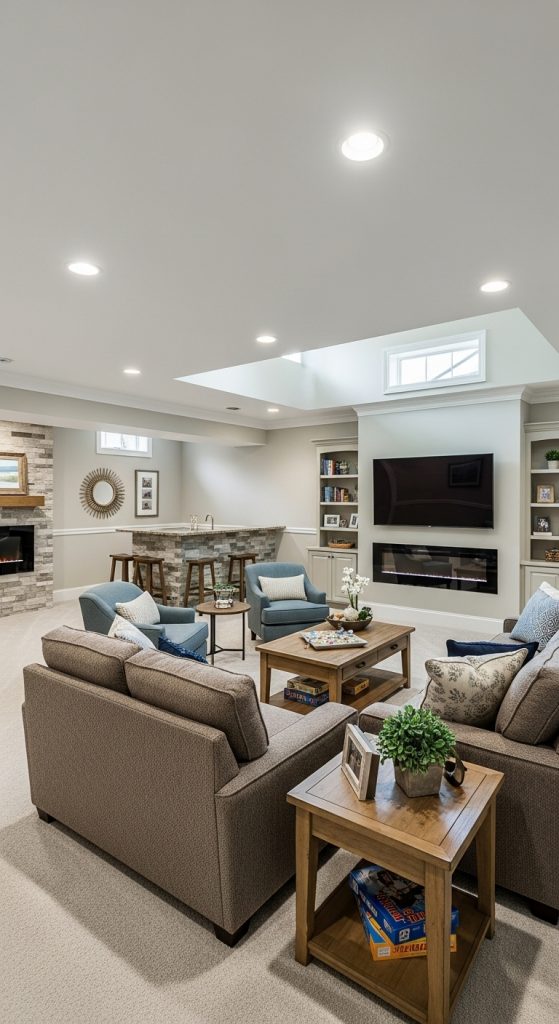
9. Painted Drywall Ceiling for a Traditional Look
If you prefer a finished and classic appearance, drywall is a traditional choice that you can install yourself with some patience and basic tools.
How to do it:
- Measure and cut drywall panels.
- Screw them into the ceiling joists.
- Tape, mud, and sand the seams before painting.
Why it works:
A painted drywall ceiling offers a clean and uniform look that blends seamlessly with the rest of your home. It’s also easy to paint in any color you choose.
DIY Tip: Use a semi-gloss or satin finish to reflect light and brighten your basement.
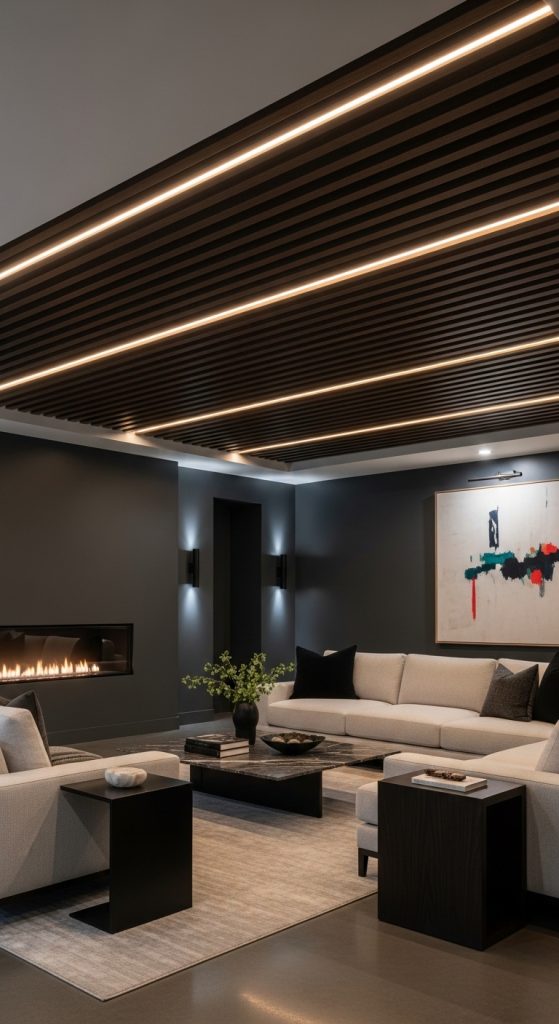
10. Slatted Ceiling for a Contemporary Twist
A slatted wood ceiling combines modern design with warmth and texture. It’s ideal for homeowners who want a high-end, stylish feel without spending too much.
How to do it:
- Cut thin wood strips or slats.
- Attach them evenly spaced across the ceiling with nails or glue.
- Leave gaps between slats for an open, airy look.
Why it works:
This DIY idea provides architectural interest and allows you to conceal pipes and wiring creatively. You can paint or stain the slats for different effects.
DIY Tip: Install LED strip lighting between slats for a modern, ambient glow.
Bonus Tips for DIY Basement Ceilings
Even with the best idea, a basement ceiling project can face challenges like moisture, low ceilings, and lighting. Here are a few tips to help your project succeed:
- Measure your ceiling height carefully. Choose materials that won’t make your basement feel too low or cramped.
- Address moisture issues first. Basements are prone to dampness, so use moisture-resistant materials whenever possible.
- Incorporate lighting early. Plan where to install recessed or pendant lights before starting your ceiling project.
- Use lighter colors. They make the space look bigger and reflect more light.
- Combine styles. For example, pair an exposed ceiling with painted beams or add a decorative trim around a drop ceiling.
Design Inspiration by Style
Rustic Basements: Try wood planks, shiplap, or exposed beams with warm-toned lighting.
Modern Basements: Go for painted exposed ceilings or slatted designs in monochrome tones.
Industrial Spaces: Black-painted ceilings with visible pipes or faux tin tiles create a bold, urban vibe.
Cozy Retreats: Beadboard or fabric ceilings make the space feel soft and welcoming.
Budget Breakdown for DIY Ceilings
Here’s a rough estimate of what you might spend on materials for each ceiling type (based on a 200 sq. ft. basement):
- Exposed painted ceiling: $100–$200
- Drop ceiling: $200–$400
- Wood plank ceiling: $300–$600
- Fabric ceiling: $50–$150
- Beadboard: $250–$500
- Shiplap: $300–$700
- Faux tin tiles: $250–$500
- Plywood: $150–$300
- Drywall: $250–$600
- Slatted ceiling: $300–$700
The final cost depends on your choice of materials and whether you already own the necessary tools.
Lighting Ideas for Basement Ceilings
Lighting can enhance your DIY ceiling and make your basement more functional. Consider these lighting options:
- Recessed lights: Great for low ceilings and a modern look.
- Track lighting: Flexible and easy to adjust directionally.
- Pendant lights: Ideal for bar areas or game rooms.
- LED strips: Perfect for accent lighting under beams or slats.
- Flush mounts: Simple and effective for general lighting.
Combine multiple lighting types to add layers and depth to your basement design.
Why DIY Basement Ceilings are Worth It
A basement ceiling project is more than just a design update. It can:
- Increase your home’s value by making the basement feel finished.
- Enhance comfort by improving lighting and acoustics.
- Reflect your style with personalized touches.
- Save money compared to professional installation.
DIY basement ceilings let you experiment creatively while keeping costs low. With the right materials and preparation, even a beginner can achieve professional-looking results.
Final Thoughts
When planning your DIY basement ceiling, think about your overall basement design and purpose. Are you turning it into a family room, home gym, office, or entertainment area? Choose materials that fit your aesthetic, budget, and practical needs.
Whether you prefer the industrial charm of an exposed ceiling or the cozy warmth of wood planks, these 10 basement ceiling ideas DIY can transform your space from forgotten to fabulous. Take your time, plan carefully, and enjoy the process of making your basement a true extension of your home.
Author
admin@weltpromi.de
Related Posts

10 Luxury Bedroom Master Antique
Creating a luxurious master bedroom is all about blending comfort, elegance, and timeless design. When you add antique elements into the mix,...
Read out all
10 Luxury Master Bedroom Attic
Turning an attic into a luxurious master bedroom is an excellent way to maximize your home’s potential. Attics often come with unique...
Read out all
10 Luxury Bedroom Master Aesthetic
Creating a luxurious master bedroom is about more than just choosing expensive furniture. It is about crafting a space that embodies comfort,...
Read out all
10 Bedroom Bed Designs
Your bedroom is more than just a place to sleep—it’s a sanctuary, a personal retreat where style and comfort meet. Central to...
Read out all
10 Beige Bedroom Ideas
When it comes to bedroom design, beige is a timeless and versatile color that exudes warmth, sophistication, and calm. Unlike brighter colors...
Read out all
10 Cool Bedroom Ideas
Your bedroom is more than just a place to sleep. It is your sanctuary, your personal retreat, and a reflection of your...
Read out all